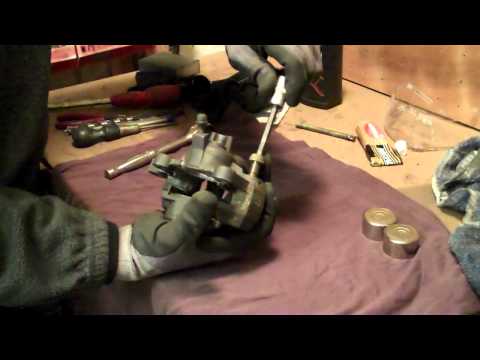
An invaluable ‘How-To’ video on restoring a siezed and tired old brake caliper back to perfect working order for just £7.50.. same principles apply to rebuil…
An invaluable ‘How-To’ video on restoring a siezed and tired old brake caliper back to perfect working order for just £7.50.. same principles apply to rebuil…
You must be logged in to post a comment.
.'))
Thanks Del. I just got a ask brake on my Busa for then first time thanks to
you!
bits left over…. thought they were built in spares haha
Had to watch this one again. As you know I’m trying to sell the ZZR. I went
to give her a bit of a clean up and a service the other day. Decided to
start on the back end and the caliper was seized. Total damage so far, one
snapped bleed nipple and one snapped screw driver, brake caliper still in
one piece, haven’t even been able to get the pads out. Hopefully after
watching this i’ll spot something I didnt notice before.
I have just completed a full calliper strip down and its all gone back
together successfully and is now not binding at all its perfect and all
down to your vid giving me the confidence to have a go at it i am soooo
very proud of my self lol at the moment so thank you sooo much for that
indecently i understand penny is a jewellery designer my girlfriend is also
a designer and is pestering me to ask if penny has a website or a Facebook
page .
Just seeing this video for the first time. Another great how to video by
professor Del! The only thing I was a bit unsure about was your bleeding
technique. It obviously works but I just cant see how it was bled that
easily. I at least cycle a full reservoir through to make sure all air is
out. I just purchased the MityVac and love it. It was only $40 and worth
every dollar.
Perfect! I’ll check it out tomorrow! Thank you so much 🙂
Hi Del, my calliper is a 2 pot system with slider pins one of which is
badly corroded. Once I have cleaned everything should I apply copper
grease to the slider pins as the Haynes manual says? I am unsure because
the manual also implies that anything other than brake fluid is a
contaminant.
cheers
Shane
superb vid well explained thanks
Great video Del! I finished cleaning and rebuilding a set of calipers for
my project yesterday with this video showing my how it is done, thanks
mate.
Just finished the rear caliper rebuild , all working fine , thanks for your
great video and advice Del.
When I first started fiddling with bikes I minced many a beed nipples I’ve
only just learned to nip them rather than lean on them
Just for a heads up and a bit of useful info…..
You’re right about the seals being totally square in profile but the
contact area is dictated by the profile of the groove they sit in. Which is
NOT square but has a taper at the base of the groove purposely added to
enable the seal to contact the piston at the seals inner edge. If you run
your finger over the installed seal you will find the seal is raised just a
little on the inner side whereas the outer edge is flush with the bore.
This point of contact makes the seal work by using the pressure of the
brake fluid behind it force the seal onto the piston diameter while
allowing it to slide out to apply the brake. There is also an opposite
action which will help the seal retract the piston just a little when the
pressure is relaxed negating the need for springs to help release the pads
when the brakes are released.
It’s a very simple and effective system which enables huge forces to be
applied without leaks or masses of complex parts and systems. the dust seal
is simply there to prevent foreign particles, crud, salt water and such
like, coming between the seal and the piston.
I used to build callipers for where I work and was surprised when I first
saw just what was involved and how much these few, but vital components do.
Also Agreed!…With all brake rebuilds, cleanliness is vital to ensure
smooth operation and longevity.
Brake seals are made of a specially formulated rubber designed to resist
the sometimes caustic effects of brake fluid ( Warnings do say don’t spill
on paintwork as it WILL damage it!!!) but which are less resistant to
attack by other oils.
I would not use a workshop grease, such as “LM” to rebuild callipers as
this will degrade the seals leading to early failure.
There is a calliper rebuild grease available for just this task which will
help with the rebuild and will prolong the life of your seals. Find it on
E-bay here…
http://www.ebay.co.uk/itm/Motorcycle-Brake-Brakes-Caliper-Rebuild-Castrol-Red-Rubber-Grease-Service-Pack-/161116609577?pt=UK_Motorcycle_Parts_13&hash=item25834c5c29
.
Did my rear caliper service and rebuild yesterday, Had the use of a friends
garage which is a great help. Worked a treat, now’s he’s going to give me a
hand removing those nasty broken header studs/ nuts. Keep up the good work,
enjoying the Sunday supplement too mate. Want to come down see you guys
this year but its a 4 and half hour drive and struggling to get Bulldog off
work
I’m willing to ignore the fact you own a harley, since your videos are so
good and helpful (Y)
red rubber grease is better
would it be better to leave that plastic cap off so the dirt falls out?
Very nice vid on GSF brake caliper rebuild but I cannot get the bolts
holding the two halfs together undone Gerr! any know how to do this??
Same rear brake caliper as ’93-’01 ZZR 1100 (ZX11 in US).
Thank you for this video, it is always interesting to get tips and tricks
from other enthusiast.
Nice video. I understand road dirt and salt caused problems, will storage
in cold weather cause the seals to fail or crack? How often should we
break it down to clean.
Hi bud why are the profile of rear and front pressure sels different ?
chhers great to have found your channel
Using grease on caliper pistons is not recommended as it will react with
the seals causing them to swell, this is why copper grease is no longer
recommended around brake pistons, seals should be lubed with fresh fluid or
better still red rubber or silicone grease.
hi delboy,
just replaced a calliper on a 98 fazer, bloody thing kept seizing no matter
how often i cleaned it. anyway watching the bleed technique (holding the
calliper above the m/c) has really helped as until then i just couldn’t get
the pressure in the calliper. Thanks for your help mate invaluable lessons.
ride safe
Ummmm I’m not sure about the factory hoses.. How would I know?! It’s a
kawasaki z750 2006 so nearly 8 years. Do you think the lines need
replacing? It’s done 32,000 km and I’m not sure if the previous guy changed
the lines ..
Thanks very much Del the caliper on the 1200 is the same as my 600, I have
one small problem is that the siezed piston is the awkward side with no way
to drift it through , any advice before I start would be appreciated , Paul
Hi Del, I’m a huge fan of your video’s – I’ve tried to bleed my brakes on
my bike and failed as there was too much air in there but after the dealer
‘bled them’ the brakes didn’t firm up that much – what do you think could
be the cause here? I’ve tried brakes on other bikes and the brake bite
happens much sooner than mine, it’s doing my head in !! ;)
The brake bleeding tip really helped me. Thanks.
i apologise if it sounds stupid.. but if take the pistons out will i get
leaking brake fluid?
Excellent mate, thats exactly why we post them… well done mate..
Yea, it seems I may have been wrong about the seals thing. I have removed
the nipples completely, cleaned them (no debris, threads and edges in good
condition, not blocked ), but when I loosen them even slightly, a 1/4 of a
turn, and pumup the lever, fluid leaks from around the bottom as if it’s
coming up through the thread. I could try getting replacements, but they
fine and were working before I broke the system down and reassembled it.
Going to take a break from the calipers for a while!
Just had to do the same with my pins. MOT garage wanted to replace discs,
pads, and order new bolts in for the caliper mount (suspiciously they went
missing!). Under £20 on ebay for bolts and new pads. Will bleed my brakes
that way such a good idea thanks for the video very helpful.
What are you polishing the pistons with. I’m about to rebuild the caliper
on my BMW gs and need all the help and tips I can find
Well Del all went well. Drilled through.. grind down an old screwdriver to
a point and tapped that bloody pin out. Installed new ones and greased up
Cheers del. I’m down in Kent to next week. ..off to france but would have
to owe you a beer when I don’t have screaming kids in the car!
oh and just another tip for others on the caliper casings there are some
really tricky bits when cleaning then like the bore holes etc I used cotton
buds to make sure no crp got down there when cleaning them up. worked a
treat