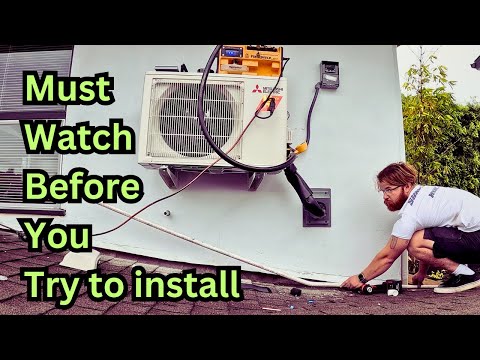
We install a Mitsubishi mini split for a customer. It was a one day job and I walk you through most of the steps involved in the work. Feel free to ask any questions in the comments.
00:00 Arriving at Job/Walkthrough
00:40 Mounting the Indoor Unit
03:23 Running the Line Set
08:10 Flaring Basics
11:09 Attaching to the Unit/Torque Wrench
12:48 Pressure Test
13:16 Pulling a Vacuum/Breaking a Vacuum
15:31 Drain Stuff/Me Being Extra
16:27 Pulling Wire Indoor Unit
17:30 Decay Test/Releasing Refrigerant
19:16 ASMR
20:03 System Running/Finishing Touches/Cleanup
21:23 Job Recap
#hvac #hvaccontractor #heatpump #hvacinstall #hvacinstallation #hvacsystems #mitsubishi #minisplit
)
buddy smoking a heater at 2:18 had me laughing my ass off
Great install overall, very good attention to detail
Great video
I see this is an old post. But I feel I should comment so that others may not make the same possibly very costly mistake….Although I find his work good on the refrigeration side, and glad to see that he added the metal nail plates, I must strongly recommend against the installation work on the general construction modification side–but rest assured many other professional HVAC, electricians, and plumbers make these same mistakes…
That is, most code inspectors would have, and should have, failed this installation as to failure to adhere to standard building codes — as most jurisdiction would not permit cutting or notching into more than 25% of the studs on any exterior or load bearing wall, and not more than 40% into a non-load bearing wall. looking at the video it appears that he is more than 40%. In this case the structural integrity of this wall may have been seriously compromised, even more because the notches were not staggered in a slight zigzag pattern across the framing as they should be when cutting across such a large percentage of the framing. The better way would be to run the condensate line inside the wall framing using 3/4 PEX snaked through 1" round bored holes in the center of the studs, slightly staggered +- 2" up and down. I recommend PEX because it is easier to route through studs, easier to snake out when it gets clogged, and less likely to crack and leaking inside the wall.
As for the refrigeration lines and power, maybe 4-12 inches above the condensate line holes, and in the case of a 2×4 studs, notch not more than 25%, or 7/8" deep for exterior and load bearing walls, and not more than 40%, or about 1.5" for interior non load bearing walls. The reason I bring this point up is that IF there is ever any structural damage to a home such as this, say due to a storm, fire, or whatever, the homeowner's insurance company inspectors and lawyers will use every little fragment they can to support their case for not paying on a claim because the contractor failed to properly follow code during installation – regardless of whether or not any inspector approved it, most inspectors will simply state that the installer was expected to follow the applicable code, and that their inspection, or lack thereof, does not give the contractor the freedom to ignore the applicable codes. The contractor could find him/her self in a very costly civil lawsuit possibly many many years later — It is a risk not worth taking. And more to the point, from a retired MEP professional who had been doing this sort of work dating back to the late 1970s — just do it right and follow the applicable building, electrical, plumbing, and mechanical codes which are the minimum necessary standards to satisfy.
E.G. see Up code – PA Mechanical Code 2021 rev. adopted from International Mechanical Code 2021 (IMC 2021)
[BS] 302.3.1 Joist Notching
Notches on the ends of joists shall not exceed one-fourth the joist depth. Holes bored in joists shall not be within 2 inches (51 mm) of the top or bottom of the joist, and the diameter of any such hole shall not exceed one-third the depth of the joist. Notches in the top or bottom of joists shall not exceed one-sixth the depth and shall not be located in the middle third of the span.
[BS] 302.3.2 Stud Cutting and Notching
In exterior walls and bearing partitions, a wood stud shall not be cut or notched in excess of 25 percent of its depth. In nonbearing partitions that do not support loads other than the weight of the partition, a stud shall not be cut or notched in excess of 40 percent of its depth.
[BS] 302.3.3 Bored Holes
The diameter of bored holes in wood studs shall not exceed 40 percent of the stud depth. The diameter of bored holes in wood studs shall not exceed 60 percent of the stud depth in nonbearing partitions. The diameter of bored holes in wood studs shall not exceed 60 percent of the stud depth in any wall where each stud is doubled, provided that not more than two such successive doubled studs are so bored. The edge of the bored hole shall be not closer than 5/8 inch (15.9 mm) to the edge of the stud. Bored holes shall be not located at the same section of stud as a cut or notch.
WOW ! These guys are total fucking idiots. Obviously un-licensed contractors.doing shitty half assed work. Hopefully they will get caught, fined & shut down before they burn down someones house !!
When your assitants get sick, check the tide. Likely good surf.
Is he gonna leave an access panel for the junction inside the interior wall?
Love your channel and all the great tips. As a DIY/homeowner I know I don't need to worry about my time as much as a professional making a living. But it's painful to imagine what the stud-notch evacuation blows are to the drywall and fasteners on the other side. They are intended for holding in tension, not shear. Maybe add a tripod to your kit so you'll have both hands free for chisel or multitool use? Just my 2¢. Again, great content and info. Thanks.
Excellent work! Ditch the drywall plugs just drill through the plate where the studs are. Enjoy your healthy youth!!!!
I hope that is not a load supporting wall.
if you take a screw longer than the guide plug, you can sometimes screw it in through the front of the wood piece and the wood piece will push out. obviously dont use a self tapping fastener so you dont drill into the metal bit
hah, this is not professional at all. Much less professional than DIY videos I've seen. Terrible.
I could say stop asking for validation and tips in your youtube video aimed at professionals, but this took from 9 till 6 with two/three people? If this is normal in the states I might have to immigrate. I frequently install two of these splits a day, alone. And we braze our indoor connections here. Gotta say you do have some high end tools for a year old business though. High costs for tools, high costs for labour, long installs… no wonder you can't pay yourself much. And nice job on those studs buddy. They're just for show most of the time anyway. Ahum. You do seem to know the correct procedures. Credit where credit is due. Breaking the vaccuum (twice) on a mini split is overkill. Pro tip for (pro) hvac collegue: work on your speed and efficiency. And don't leave your high end tools behind a window in your truck for the world to see.
Good job on the video. It was a little more helpful than some.
For the wire butting, I usually score it lightly (making sure not to totally penetrate the insulation and cut inside wires) in line with the wire with a utility knife only penetrating the last half inch of outside insulation where the wire will be stripped anyways. Then grab a wire and peel insulation back.
Or I will score around the wire where i want the butt of the insulation (making sure not to totally penetrate the insulation and cut inside wires). Then bend the wire back and forth at the scored section to finish the cut through the insulation, and slide the insulation off of wires. Hope this helps. Thanks for the video. Keep up the good work!
We swage and braze the indoor unit when possible.
But what about the studs that you trashed? Why aren't you using a hole saw? Why are you using a hose inside of the wall? Why are you doing this job? Please don't ever do this again!
You’re supposed to take the pilot bit out before fully coring the hole. The pilot bit is just meant to keep the core center. Once you get the core started / traced then you take the bit out before fully coring the hole.
Buy a pro press and fittings no more flaring
I use 14ga marine grade fork terminals with heat shrink. Use a good crimper and your heat gun. You’ll have less communication issues if you do it this way. If you’re cleaning the outdoor unit and cleaner/water gets on your terminal strip, capillary attraction will take water down that wire and set up corrosion or continuity. Then it’s communication error time.
I always give myself a day and a half to two days to install mini split heat pump. I work solo and I do a good job like you. Guys like to brag about getting it done in one day by themselves, or how far they travel for jobs. Don’t call me when it breaks, because I don’t work on anyone else’s m-splits.
Wiggle your holesaw back-and-forth as you go in then the plug won’t fit so tight inside the hole saw. Then with a screwdriver or a punch or a screw drilled into the wood plug and pulled out with pliers works nice.