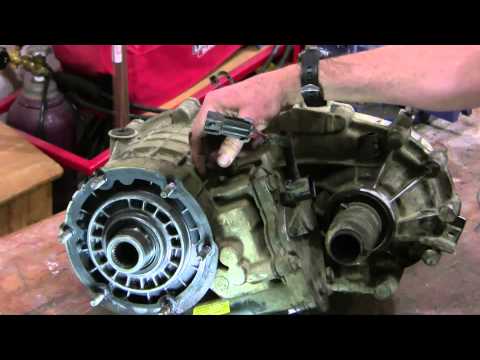
A step by step video showing how I diagnosed, removed and partially tore down a damaged GM 246 (NP246) transfer case on a Chev 2000 Suburban 4X4 with the 4L6…
A step by step video showing how I diagnosed, removed and partially tore down a damaged GM 246 (NP246) transfer case on a Chev 2000 Suburban 4X4 with the 4L6…
You must be logged in to post a comment.
)
Yeah, I understand. I wondered if it would be worth it for my vehicle, since it’s old and other problems could have been coming. But it turned out to be the right decision for me — the truck is still going strong and we use it every day. Cheers!
Thanks for the video. I got the transfer case out in 1 1/2 hours, went very smooth, now to open it up and see where the problems are at. I was quoted $1000 to trade my core for a rebuilt one which doesn’t seem too bad. I don’t need my truck for a while so i will mull it over and see what i end up doing. Thanks again.
The fluid I used was what was sold and recommended to me by a GM dealer — they use AC Delco for this.
Wow, very good video here. Thank you. I have the exact same trasfer case. I was going to to a fluid change and was wondering if I should go with the GM fluid or ac delco. I see you used ac delco, would you still suggest using this fluid? Or go with GM?
We need solution every 6 month i change the chain omg..! In ksa we need the 4wd very much
You want big snap ring pliers, and you want to loosen the bolts that hold the two cases together before trying. Then expand the snap ring and pull the two cases apart. All of a sudden it all falls apart. I think I got lucky since it happened quickly without a lot of fuss, but as you see I had giant pliers. I’m not sure I know of any other tricks. Good luck!
Hi, great video! I was wondering if there was a trick to getting the snap ring off that you took off right before fully separating the transfer case. My buddy and I tried and tried and after looking down in there we don’t see any way it could come off the lip. Any help would be greatly appreciated thanks!
You’re welcome. If you want more detail on the actual rebuild, Rickafix1 did a very detailed set of videos showing that.
I will be using your video as a guide. Very thorough. Thanks for posting it.
The frustrating thing about doing something like this the first time is not knowing how it goes together. Once I knew what was there, it was much easier. Of course those extra large snap ring pliers helped a lot. Thank you for watching!
Ah yes the snap ring, caused me sooooo much grief. I ended up using a pair of welding pliers to hold it open while putting the halves back together.
Knowing how much work this is, I am not at all surprised at your bill — it sounds very reasonable to me.
$2000! thats alot for something that easy to fix lol.
Thank you for the video. I have a 1996 Chevy Suburban 1500. With no choice but to pull into a mechanic’s station, I asked them to diagnose. It was indeed the transfer case. Same exact noise. They gave me a total bill of $1400. $750 for a salvage yard transfer case and seal $26, the remaining $550 for no specified reason. I assume labor however, they had it on the lift for a total of 5-6 hours if that. How long did it take you to do? Does this sound sketchy to you as well? Thank you.
Thanks, Ian.
Thanks… I really appreciate and enjoy your videos!
nice job, thank you for the video
This vehicle was made before all wheel drive became popular. It can be four wheel drive or two wheel drive, depending on where the transfer case shift levers are positioned. Two wheel drive vehicles don’t have a transfer case, power just goes from the transmission into the drive shaft and into the rear diff. It’s a much simpler system with fewer moving parts. 2WD vehicles are less expensive and also get better gas mileage.
My is not all wheels drive I
For anybody reading this and considering a DIY rebuild, you will want to watch Rickafix1 do it without a lot of fancy tools. Great series!
I just finished the first half of the NP246 rebuild. It is Long but it thorough. to forever to upload. here is the name of my page RICKAFIX1 If you get a chance take a look thanks again for your video helped out a lot and i hope i said your name right lol
That would be a huge addition, please send me a note when you have it posted. I use Premier Pro CS4, which I bought as a master suite when my son was in university. University students get Adobe products at 80% discount and you can get photoshop, premier pro, and a whole lot more for about $600. Note however that it takes a few hundred hours to become proficient. Apple make competitive and much cheaper software, though top line software will be expensive no matter what.
Well I just bought a cam and i will do a thorough rebuild walk through of my rebuilding of a NP246. What recording software do you use to capture and edit? thanks
I don’t know what the span was but I got them at a discount supply house, Princess Auto in Canada. That ring is about 6 inches in diameter, you need the largest you can find. I’m hoping somebody will do a thorough rebuild here on youtube, so that those details are clear as well. Thanks for your comment.
Nice video on the transfer case. I just dropped my np246 and looking for a good snap ring pliers to get the first snap ring off so I can take the cover off. I guess the $20 ones at Pepboys is not going to cut it. What was the span on the snap ring pliers you used to get the first ring off??? Thanks
Yes, that’s the video I was referring to. It’s not necessarily his problem, but it gives a good view of how to install and remove the encoder motor.
Try this video:
Yukon Transfer Case 2
.
realfixesrealfast
Oh, I’m glad you recorded your experience for the thread here. When I removed the encoder motor (while the case was on the bench) it came off perfectly, and putting it back on was easy too. But maybe in your case it needed more wiggling that wasn’t possible in the confines of the vehicle frame. Nothing beats hands-on experience! Thanks again for your contribution.
After doing this repair I learned a bit. First thank you for your video , it was very helpful for the most part. However taking your suggestion to remove the encoder motor was a real mistake. It is very easy to get the mating shafts out of alignment and have real difficulty getting the encoder back on. I had to remove the electric motor from the encoder gear case and manually position it to the neutral position on the transfer case( which took some doing ) So Leave the motor on!
In the video you see the output bearing at the rear shows pitting of the ballbearings. Those steel bearings were bouncing and binding in their track, causing that clacking sound. The vehicle is still working fine now, and we use it every day. I wondered if it would be worth the effort to fix such an old vehicle, but in retrospect it was clearly a good decision.