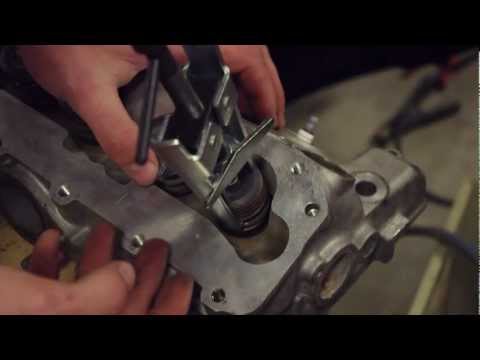
TheCousinDan shows you how to replace your valve seals and grind the valves into a proper seat in your cylinder head.
TheCousinDan shows you how to replace your valve seals and grind the valves into a proper seat in your cylinder head.
You must be logged in to post a comment.
)
perfect ,,thankyou ; tihis is you a macanic doctor.. :)
Lol it is against Adsense rules to say Click on my ads.
Nice job! Thanks!
Working on a 67 Mustang V6 with my son. This video is great. The comments
below also helped. I watched your video and went out with my son and
removed the valves from the head. We are now going to take the head to the
machine shop to have it resurfaced.
Daniel, seems like a better way to remove the keepers would be with a magnet
and / or a crook-nosed pair of needle nose pliers. Same with re-install.
Hard to make your fingers cooperate while trying to push spring down, and
if you get the spring down far enough with the clamp, the keepers should
almost fall out anyway.
I have to replace mine and don’t want to remove the heads so, your video
was very helpful. Thanks!
Great video on valve seating! I have a Toyota 1.8 Cylinder Head and was
using compressed air with the head inverted and oil on the valves to look
for leaks. I placed a towel around the air nozzle from my compressor hose
and saw some oil bubbles in the valve seat when blowing air into the intake
ports. Should the valve seal well enough that air from the top of the head
to stop the air in this situation? I guess I don’t know what the PSI is
here as the compressor is 125 PSI but the towel may only hold 10 or 15 PSI.
On an engine that’s approximately thirty years old, why not just get new
valves, guides, springs, retainers, and keepers as well? I’d have had the
head hot-tanked and zyglo tested to insure the head casting was absolutely
sound. In my years at an auto parts store I observed 90% of problems ever
encountered with rebuilt engines were in in the head. It was either a
broken spring or a dropped valve-regular rebuilds don’t include new valve
train. It’s an extra cost option that I strongly advise.
25 years ago I worked in a machine shop..we took the springs and keepers of
with a deep socket …about 3/4 ..put it on top the valve spring and smack
it with a hammer…that way you only need the tool for reassembly ..10
times fast disassemble
i reckon an easy way to remove the valves and keepers, use a socket and
extension bar,make sure the socket sits flush and big enough to clear the
middle valve and keeper. and just tap tap tap until the keepers fall out :)
next time use a magnet
This video is how to do it, the hard way.
My reasons are this.
A valve spring compressor, that reaches around the head is easier to use.
Valve keepers are easier to remove, a magnet should suffice.
Cleaning valve stems, a wire wheel, on a bench grinder.
Quicker & easier to use.
Lapping valves, should be done with, a suction cup on a piece of dowel,
attached to the head of the valve.
Reason, you can see the progress being made on the valve & seat.
Also avoids potential damage to valve keeper area.
Also no HITTING of parts at ANY time, that should never happen.
If it doesn’t come out, or replace properly some thing is wrong.
Your valve train is an important part of your engine, to important to treat
it as such.
Good informative vid. Thanks man
get a magnet
Thanks for the information. What did you use to clean up with before you
did the final assembly?
Nice video specially the valve grid part I did with 1200 water proof . The
keepers are the most difficult to place them back, I used a bit of
vaseline
This is the best video on this subject I’ve seen. Thank you. Now I’m
ready to start on some 67 ‘Vette heads!
I am with ford302redneck on this one. Machine tools cut valve seats and
faces at 45 and 46 degrees to seal. [Consult machinist to see which is
which] The machine tooling creates a near perfect face on the mating
surfaces. Old story, young men are continually encouraged to be proponents
for abrasives abuse which pit the machined surfaces, ultimately benefiting
a winning racing teams agenda. The learning curve on engines is steep. I
wonder if Daniels 944 has had less than 4% leak down since he began
perfessonally’ maintaining it.
Hey ford302redneck. Valve grinding compound is for exactly what was shown
in this video, lapping valve seats. The stuff you’re thinking of to check
the contact points of mating surfaces is called Prussian Blue. Who’s the
noob now?
not bad!
i’ll click any ad on any video you made just because this is an awesome
channel. thanks for uploading all this, man!
You have a nice pleasant voice
Great video!
Seriously for the total time you were farting about trying to grind the
valve in the spring was still under compression. I hope that head wasn’t
off your car the valves are meant to be spotless of all carbon and
polished. to do your head properly would take 6-8 hours depending on how
bad the valves were.
not bad effort needs a lot of work
The Keepers are the hardest to reinstall and that wasn’t shown.
you tecnic no are the correct. wendo you wath I send a video with the
corect technik
good video
Dude, your video helped me out. I have a 83 Thunderbird that’s been built
into a nice little street rod, I bought it, ran it a few times, I was
racing a rice burner, I had him by a car length and all of a sudden lost
power and it started skipping. I burned a hole in the valve, I was going to
spend the $$ to have the heads re-done, but watching your video, I think I
can save many $$ and do it myself, I’m glad I went to your vid first,
Thanks buddy, I’ll follow up in a few days and let you know how it turns
out,
why not just use a one handed spring compressor, look very similar to a G
clamp!! and a socket and hammer for the shock & persuasion to free the
collets/keepers!
Because I don’t have one 🙂
I learned to do this on VW heads with a electric drill. bit quicker, but
you have to be extra careful not to get aggressive and and take too much
off. if there is not much pitting on the valves& seats, doing this way by
hand works fine. Better to take too little off and do it a bit more than go
to far.
Isnt possible that the valve and the new “seat” can be abit of ? :S not
sure how i can ask that question better, do to my english… xD Hope that
makes sense to u, thanks again for a great video!
good video man! you made it look so easy! now for my 4.3L, it says I am to
use the o-ring that go right under the keeper. do i really need too
especially if I already installed new seals? thanks!
Worked for me. This does it without special tools.
Why not use a brass wire wheel on a bench grinder? That is how I do it at
my shop to clean up valves.
I mean really, you think some gritty paste will do what machine shops spend
hours with very expensive machines? And if your going to clean the valves,
why not spend the extra few minutes and throughly clean em.
why not just go to autozone and buy a 3 dollar valve suction
cup……………
man this video showed me exactly what i needed to rebuild my heads and the
tool that you used to compress the valve is the same one i got form auto
zone but i didn’t know why it wasn’t compressing my double springs all the
way down i thought it was the tool but now thanks to your video i can see
that you just have to to work at it a little harder to get the keeper out
thanks man
U did it great…..