https://www.1aauto.com/timing-belt-and-component-kit-gates-tck334/i/gatbk00030?utm_source=YouTube&utm_medium=description&utm_campaign=videodesc&utm_term=cTDOhyi9SkA
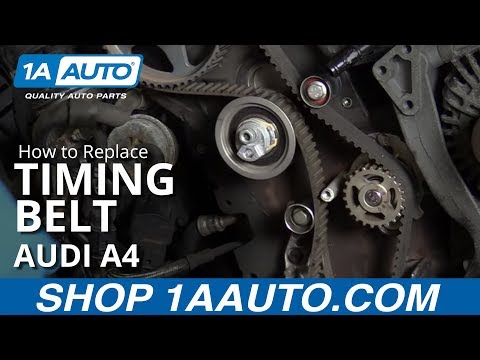
In this video 1A Auto shows you how to remove, replace and install a new timing belt and water pump. This video applies to the 05, 06, 07, 08 Audi A4
🔧 Instructions:
1. Removing the Belly Pan and Bumper Cover 0:51
2. Positioning the Front Lock Carrier 3:37
3. Removing the Serpentine Belt 7:25
4. Accessing the Timing Cover 7:46
5. Removing the Timing Covers 8:20
6. Removing the Timing Belt 9:34
7. Removing the Water Pump 10:52
8. Installing the Water Pump 12:09
9. Installing the Timing Belt 13:08
10. Installing the Timing Covers 16:58
11. Installing the Serpentine Belt 18:34
12. Repositioning the Front Lock 19:54
13. Installing the Impact Braces 21:33
14. Installing the Bumper and Belly Pan 22:53
15. Refilling the Coolant 26:33
⚠ DISCLAIMER:
While 1A Auto strives to make the information provided in this video as accurate as possible, it makes no claims, promises, or guarantees about the accuracy, completeness or applicability of the content. No information contained in this video shall create any expressed or implied warranty or guarantee of any particular result. All do-it-yourself projects entail some risk. It is the sole responsibility of the viewer to assume this risk. 1A Auto is not responsible or liable for any loss damage (including, but not limited to, actual, consequential, or punitive), liability, claim, or any other injury or cause related to or resulting from any information posted in this video.
)
Thanks so much for the help. The only difficulty I ran into was the crankshaft bolt, which is called out as 12pt in the video but I missed it. Since it is only needed to turn the engine over I just gently used a 21mm hex which gripped enough. Also despite much effort I couldn't get the radiator drain to function. Instead I removed the hose from the radiator, which turned out to be quite easy and not as messy as I had expected.
Hey guys. After completing the procedure, I turned the car, and started just fine. I watched the bubbles in the expansion tank and refill it accordingly. But I notice that fans were on all the time. I though that there was no coolant in the radiator and since one post refer that the little valve to drain the radiator in the lower hose has to go with the flow of the coolant, I am concern. I wonder in what position that valve needs to be? North and South or East to West. I do not want to block the flow of the coolant. And why the fans are constantly running?. They start slow and then they get in high speed. Thanks for the feed back.
Marcos
Awesome. Very detailed video. In fact, even "My Grandma" could easily do this. I did this in half of day, taking my time. In my case, Audi A Quattro 2007 US model with 90k miles, the pipe running in front of the belt cover was made out of metal instead of plastic. I had a hard time loosing it up becasue the rubber was stuck to the metal. Nonetheless, using the 90 degree pick I and spraying wd40 I was able to loosing it up without any damage. Other than that, the video is very straight forward. It is important to use the right tools mentioned at the beginning of the presentation.
THANK YOU GUYS…
The maintenance of the Korean and Asian cars is much easier than the German car, especially since it is very expensive in my country , but I love the German car and my greetings to you on this wonderful video
CAUTION: There are difference between the US and European version of the car, especially in the cooling-system! In the EU version, there is no coolant-drain. The valve shown at 6:35 will cut the whole system – so make sure it is open before starting the engine… (it has to point in the direction of flow). To drain the coolant itself, you have to open the connectors to the radiator by lifting the metal bars up an unplugging the hoses. Furthermore, there are connectors for the headlight washing-system to be disconnected before removing the bumper in the EU-model. The rest of the Video is perfectly the same- thanks for uploading!
I'm doing the timing belt on my 2005.5 Audi A4 right now and there are a few minor differences between my car and the video:
1: There were two connectors and a plastic disconnect for the headlight washer system in the left hand corner at 3:30. The other connector will come loose just like the video but there's a little retainer clip that holds the washer system disconnect together BE CAREFUL removing the clip as it's all plastic and it will shoot across the garage if you aren't mindful like me.
2: The drain cock at 6:20 did not work on my car. If this happens you can use the 90° pick to pop the metal clip up from above the car to pull the lower radiator hose and drain it that way.
3: The plastic pipe at 7:55 on my car appears to be made of metal. You can use hose pliers and Lisle tool 47900 if you have difficulty, but try not to mangle the hose because it has a crimp fitting at the other end above the turbocharger.
4: At 8:23 the timing cover is a different configuration; it also has a 'window' that you can remove to see the cam gear. There are the 3 T30 bolts like the video shows as well as four 10mm hex head bolts with one of them hidden near the wastegate of the turbocharger; three of the bolts will be short and one of them will be about 2 and a half inches long. This older style cover makes up a majority of the entire timing belt cover leaving a small lower cover that sits right over the crankshaft gear.
5: At 8:36 the crankshaft damper bolts were 6mm allen head bolts. Again, I think this is another difference in the model years as it's a 2005.5 model and the one in this video is an '07. Exercise a lot of care removing these bolts to avoid any frustration and replace them with new ones.
Anyways, just wanted to pass this information along to help anyone out who has an older B7 A4. Most of this video is spot on with my car, but I wanted to share my experience.
One last thing: Doing this job allows you to get a number of other jobs done as well, so if you plan to replace your thermostat, replace the outlet flange on the rear of the head, replace the overflow tank, repair your windshield washer reservoir, replace the motor mounts, replace the alternator/tensioner/idler, and replace city lights/headlights.
Thanks 1A Auto Parts for making this video; it took most the guess work out of getting to the timing belt on my car!
THANK YOU 1A AUTO. THE VIDEO IS VERY DETAILED AND HELPFUL. ABSOLUTE WORTH 27 MINS.. CAN YOU PLEASE INFORM AS TO THE ACTUAL TIME CONSUMED FOR THIS JOB WORK..
A1 video, gonna do this job myself now, best explanatory video out there.
I have a question, in other videos and the service manual, it says to set the crank back one tooth before putting the belt on. You guys just put it on the same way it came off. Which way is best? Or do they both work so long as the marks line up?
very detailled video! this is the best diy for the 2.0tfsi out there.
So I'm kind of assuming a similar process for an mk2 Audi TT with a 2.0T engine
I'm trying to replace timing chain tensioner on my 2012 Audi A4. It would be great if you guys can make a video for the chain tensioner. I buy most of my parts from A1 Auto. I love quick shipping and all parts fit perfect.
Thank you,
Jay
Where are you guys out of?
Should i change my alternator belt at the same time?
good video I just need the right tools very helpful thanks alot
awesome video indeed. Helps with my planning on my personal timing belt service.
You are the best.
Excellent clear helpfulThanks a lot.
Thanks and greetings from Denmark.
I have just start working with this, i'm a new mechanic and your videos i need to say that they are really helpful and they keep me motivated, can i get a email of you if i ever want to contact you for any suggestion?
Thank you!
Thanks for the very detailed and informative video. Def took the mystery out of taking on this job.
You-da-Man! After watching this I feel confident I can do this with relatively no problems. Thanks for this video
Very helpful video…Thank you so much
Very helpful video. I need to do this job on my friends Skoda Octavia with the same engine.
BTW, it's much easier to rotate the engine if you take the spark plugs out 🙂
very useful. thanks for the info
nice work thanks