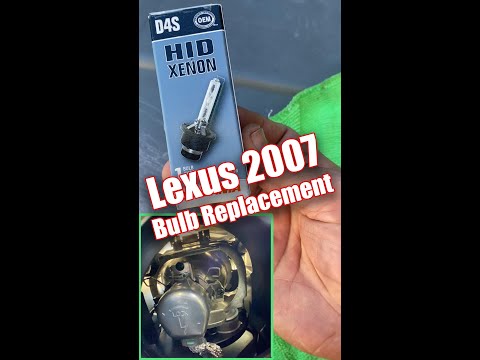
Lexus 2007 ES350 low beam bulb replacement. I show you how to remove the old one. The area to work is very tight and difficult to access but you can do it.
I had only one option at my local auto parts store that said fit my vehicle so that’s what I purchased and installed. These bulbs are expensive but they last longer use less power and are brighter.
You can find the bulb I installed on my affiliate link: https://amzn.to/3QXGyot
The bulb you’re looking for is a Xenon D4S
If you have any questions please leave a comment. Thanks for watching!
)
How are you going to sit there and make it look so easy I have been sitting here for 4 hours try and put the ball back in I can't see down there so how are you showing this video of the area that everything's going in I am so frustrated please help
Best video out!! It was the CLIPS.. I’m a lady and was able to change my headlight, and saved $$$… Thank you.. new subscriber.
There are probably 100 videos on YouTube for this. Yours is the only that is clear and shows the process from start to finish. Great video!
운전석쪽 전구교체할 때 정션박스 뚜껑을 열고 교환하면 움직일 공간이 넓어져서 좀 편해요.
Great video! How do you replace the ballast and low beam projector lightbulb? Thank you.
Thanks. Similar setup on an '04 RX330. Your video was very helpful and I commend you on clear filming and getting right to the point.
IMPORTANT: These bulbs are high voltage bulbs. It is imperative that you disconnect the negative terminal of the battery before proceeding. It's a 10mm nut. A ratcheting wrench works nicely here.
The covers over the compartment where the bulb resides rotate 20° or so counter-clockwise. They are very tight and it takes some muscle to remove them. It helps to remove the electrical connection (white) by pressing the tab at the center of the male (outer) piece. Those came out fairly easily if you are familiar with this kind of socket arrangement.
Then move the cover out of the way. You can't see what you are doing, but, still, a headlight helps. Inside the compartment, on the back of the bulb is the silver electrical connection to the bulb itself. It easily rotates about 10° counter clockwise to release. Move it down and out of the way.
Now you are going to need to rely on your sense of touch and the video. Study the wire clip arrangement. It has two "ears" that you are going to press slightly forward and then inward about 10° towards the 12:00 position. Do the same for the second wire "ear". Now the wire harness will flop downwards, and, with a little luck it will remain in the hinged position.
Remove the bulb, noting its orientation. There is a single rectangular notch in the bulb's collar. That's going to face up and end up at the 12:00 position. WAIT!! Before you get all ginger and start sticking the new bulb into the space, put your fingers into the opening and feel where the bulb needs to go. If you just put the bulb in without doing this, you risk dropping it into the outer space of the light assembly and you'll have a dickens of a time retrieving it. Ask me how I know. Luckily I had one of those flexible gripper tools with little wire fingers and, by the grace of the Good Lord above, I was able to snag and retrieve the bulb. No don't you repeat my clumsy error.
OK. Now you have the bulb in place and you rotate it a little to make certain that rectangular notch is properly aligned and the bulb is steady and won't rotate. Good. Now, again relying on your sense of touch you are going to gently lift the wire harness up and push the ears, one at a time, slightly forward and inward towards 12:00 and then move each outward again, but now it's behind the outer portion of the bulb receptacle collar (see video. Sorry about the awkward naming here.) Once you have them both clipped in properly (the bulb will feel snug and secure in its place if you've succeeded), you need to seat the silver electrical connector offset to the counter clockwise direction 10-15°, push it in to fit snugly on the bulb, and then turn it clockwise 10-15°.
Congratulations on accomplishing 50% of the job. Now repeat this process on the other side. After you complete that, re-connect the negative terminal, tapping the battery connector downward as far as it will go before tightening (the posts are tapered: this insures a tight connection) and check to make sure both lights come on.
OK? Good job. Enjoy the rest of your day/evening.
Again, kudos on a well-executed video. Thanks.
Dealer only charges $450.00 to change the bulb. Change both under $1000
Hey this is a good guide. That is a tight fit and hard to figure out on your own! Thanks for the great video
Passenger sides impossible
What if the the hood latch is stuck? Can you go through the fender liner?
You ain't showed nothing
Book marking this video! Liked and Sub'd thank you.
Dude. THANK YOU. Holy. Ive wasted an hour trying to fit my hand in there….
Same procedure for all lexus HID low beam lights. Was the OEM bulb a Phillips? Mine lasted so long 2004 with 225k miles. Definitely not as bright as brand new but it still worked. I recently replaced. Accidentally dropped the new bulb inside the housing for passanger side. Had to take off front bumper cover to remove headlight assembly to fish it out the pain…… thanks toyota
Thank you! I thought your directions to the point!
Is this the same procedure for those equipped with AFS headlight assemblies? (Motorized aiming)
Do they use the same D4s bulb on the 2010 rx350?
Came here after my failure, thank you for the breakdown!
I’m having struggles putting the plug lock back on any tips?
Although I do appreciate the video, it was very confusing because the words and pictures were a bit too vague. There needs to be a lot more detail.
For example, when you say that the clip needs to be underneath the connector, does it mean that it's closer to the ground or closer to the front of the car. Either one means "underneath".
Thanks for this, took about 20 minutes taking my time