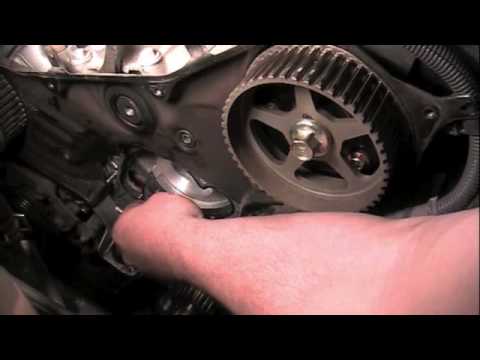
I have an odd question, my buddy has a 03 Sienna that has this engine and
the belt is out of time, whoever installed it before he bought it didn’t
time it right. The crank bolt isn’t coming off but I’m wondering if it’s
possible if I just took the tensioner out, removed the top cover and took
the belt off the cams and retimed it that way by just using the marks on
the outer crank pulley and rotated the crank to TDC. Only thing that I’m
not sure about is that the tensioner pulley is the last to go on and I wont
be able to remove the belt from the tensioner since the lower cover will
still be on.
Lastly, it would have been nice to have mentioned that you did drain the
radiator and that this engine is or is not an interference engine and what
caution you would use if it were an interference engine: Gates website
says that my 03 highlander 3.0 is not an interference engine and I think
this engine is the same as mine…..however, the manual does state to
rotate the crank 60 degrees counter clockwise so I guess the pistons will
never touch the valves,,,,,,,,,,,,,??? don’t think this was needed as you
did not do it either
Number 3 Things I like: you are very patient….you explain
well…..you loosen up the bolts first by hand then use power tools when
you can….. some guy mentioned that he used a double nut on the bolt with
the socket to remove the stud and another use vice grips with the socket I
did not notice you cleaning the surface of the water pump nor did I see you
use any sealant; perhaps this is not needed??
one guy marked the old belt with liquid paper and the timing marks on the
engine and one guy mentioned about using the marks on the new belt or
transposing the old marks onto the new belt…………..just some
ideas…………..not needed for a master mechanic like this guy
Great video. The only thing I’ll add, after replacing my timing belt on an
02 Sienna with the same motor, is that after you release the tension on the
hydraulic tensioner, check your timing before you button it back up. If
you don’t, and you are off a tooth, your engine will be toast!! To do
this, spin the crankshaft two full revolutions or 720 degrees. To do this,
put the crankshaft bolt back in without the harmonic balancer, and use a
long handled breaker bar or ratchet to turn the motor clockwise only. If
you meet hard resistance (other than pressure building up in the cylinders)
then stop as you may have made a mistake and a valve may be hitting the top
of the cylinder. After you turn the crankshaft over two full revolutions,
check the timing marks on the two upper camshafts to be sure they are
pointing to their respective reference marks on the black timing cover
behind the cam sprockets. Don’t worry about the marks on the belt. Just
check to make sure the marks on the crankshaft and the two camshaft
sprockets pointing to their respective reference marks on the motor (same
ones as earlier). Also, I used a couple of the inexpensive black plastic
spring clamps from HF to hold the belt on the pulley instead of using zip
ties. On the Sienna, it was very hard to get the zip tie on the back
pulley, so I tried the clamps. They work great. Easy on, easy off, and
they have strong tension so they hold on nicely. I put them on the bottom
of the cam sprockets so it held the tension for the whole top section above
that point on the sprocket.
You’ll notice he has a contingency plan for every eventuality, which
suggests he’s done this many times before. So he doesn’t cuss, he just goes
to plan “B.”
did you put any compound on the water pump or just the gasket Is it
necessary to replace water pump, hydrolic tensioner; i’m a novice so wonder
how long till they would come out to burn you. great vid. thanks.
when you do the belt you always do the tensioner & waterpump too, thats way
its done for the next 50,000 or so miles. good or bad you change to save
your self the trouble.
when you are aligning the timing marks for the pulley for the RH cylinder
head is it supposed to snap into place (TDC) like the LH cylinder head? i
find that the LH pulley snaps to TDC very easily, but the RH pulley doesn’t
want to snap to TDC. I know the camshafts are aligned correctly to their
perspective dots, but i dont know if setting to tdc like that is normal. if
you can recall how it felt when you did it for this video, please let me
know if I am right or wrong.thanks(awesome turotial!)
Great step by step, but I do think you need to stress how important it is
that the viewer understands that the tension between the two cams is tight
as well as the correct amount of teeth remain between the two cams when you
put the new belt on. I do this by marking the old belt (and pulley) before
the old belt comes off and then transfer those same marks to the new belt
and make certain they are the same number of teeth apart.
Just finished replacing the water pump, timing belt and tensioner on my ’99
RX300. With your instructions, the operation was a total success. The bit
about removing the studs was especially helpfull. I used a couple of jam
nuts and a wrench on the studs to help the Torx socket, so it wouldn’t
break off the stud tips. I had a REALLY rough time getting the harmonic
balancer bolt off. I ended up making a tool which uses the two threaded
holes in the pulley to keep the crank from turning. Thanks!
How would you get the coolant back in the block after reinstalling the
waterpump when the thermostat is closed? This is about the only part i dont
understand.
)
I have an odd question, my buddy has a 03 Sienna that has this engine and
the belt is out of time, whoever installed it before he bought it didn’t
time it right. The crank bolt isn’t coming off but I’m wondering if it’s
possible if I just took the tensioner out, removed the top cover and took
the belt off the cams and retimed it that way by just using the marks on
the outer crank pulley and rotated the crank to TDC. Only thing that I’m
not sure about is that the tensioner pulley is the last to go on and I wont
be able to remove the belt from the tensioner since the lower cover will
still be on.
good job but i would have replaced the broken bolt and adding some
anti-seize lubricant for the next time around.
Thank guys. Really good tips.
Lastly, it would have been nice to have mentioned that you did drain the
radiator and that this engine is or is not an interference engine and what
caution you would use if it were an interference engine: Gates website
says that my 03 highlander 3.0 is not an interference engine and I think
this engine is the same as mine…..however, the manual does state to
rotate the crank 60 degrees counter clockwise so I guess the pistons will
never touch the valves,,,,,,,,,,,,,??? don’t think this was needed as you
did not do it either
Number 3 Things I like: you are very patient….you explain
well…..you loosen up the bolts first by hand then use power tools when
you can….. some guy mentioned that he used a double nut on the bolt with
the socket to remove the stud and another use vice grips with the socket I
did not notice you cleaning the surface of the water pump nor did I see you
use any sealant; perhaps this is not needed??
one guy marked the old belt with liquid paper and the timing marks on the
engine and one guy mentioned about using the marks on the new belt or
transposing the old marks onto the new belt…………..just some
ideas…………..not needed for a master mechanic like this guy
why not make 2 revolution to make shure everything is good?
Great job guys, especially liked the wire tie tip to keep the belt in
place.
A $1500 job in 19 minutes…Thanks for sharing.
Thank you for sharing it. This is really very helpful.
That video was perfect very informative!
Great video. The only thing I’ll add, after replacing my timing belt on an
02 Sienna with the same motor, is that after you release the tension on the
hydraulic tensioner, check your timing before you button it back up. If
you don’t, and you are off a tooth, your engine will be toast!! To do
this, spin the crankshaft two full revolutions or 720 degrees. To do this,
put the crankshaft bolt back in without the harmonic balancer, and use a
long handled breaker bar or ratchet to turn the motor clockwise only. If
you meet hard resistance (other than pressure building up in the cylinders)
then stop as you may have made a mistake and a valve may be hitting the top
of the cylinder. After you turn the crankshaft over two full revolutions,
check the timing marks on the two upper camshafts to be sure they are
pointing to their respective reference marks on the black timing cover
behind the cam sprockets. Don’t worry about the marks on the belt. Just
check to make sure the marks on the crankshaft and the two camshaft
sprockets pointing to their respective reference marks on the motor (same
ones as earlier). Also, I used a couple of the inexpensive black plastic
spring clamps from HF to hold the belt on the pulley instead of using zip
ties. On the Sienna, it was very hard to get the zip tie on the back
pulley, so I tried the clamps. They work great. Easy on, easy off, and
they have strong tension so they hold on nicely. I put them on the bottom
of the cam sprockets so it held the tension for the whole top section above
that point on the sprocket.
That was awesome. Great video guys
You’ll notice he has a contingency plan for every eventuality, which
suggests he’s done this many times before. So he doesn’t cuss, he just goes
to plan “B.”
where can i get a set of tho stud removal too and whats the name of it?
I don’t think they reply to their comments lol. Take it to a mechanic. What
kind f noise is it making?
This video was very thorough and professionally developed. I was able to
change the timing belt in my car with minimal issues. Great job.
did you put any compound on the water pump or just the gasket Is it
necessary to replace water pump, hydrolic tensioner; i’m a novice so wonder
how long till they would come out to burn you. great vid. thanks.
when you do the belt you always do the tensioner & waterpump too, thats way
its done for the next 50,000 or so miles. good or bad you change to save
your self the trouble.
How much does one of those hydraulic belt tensioners cost? It looks like
it’d be expensive as hell.
Do you have the part number for the stud extractor kit? I can’t seem to
find anything like it.
Very helpful info. Puts my mind at ease about doing it myself. Thanks again!
Is that Lexus an interference engine? Like if that belt snapped, would it
destroy the engine?
you guys are really the best
when you are aligning the timing marks for the pulley for the RH cylinder
head is it supposed to snap into place (TDC) like the LH cylinder head? i
find that the LH pulley snaps to TDC very easily, but the RH pulley doesn’t
want to snap to TDC. I know the camshafts are aligned correctly to their
perspective dots, but i dont know if setting to tdc like that is normal. if
you can recall how it felt when you did it for this video, please let me
know if I am right or wrong.thanks(awesome turotial!)
Grenade tensioner lol
Great step by step, but I do think you need to stress how important it is
that the viewer understands that the tension between the two cams is tight
as well as the correct amount of teeth remain between the two cams when you
put the new belt on. I do this by marking the old belt (and pulley) before
the old belt comes off and then transfer those same marks to the new belt
and make certain they are the same number of teeth apart.
I can’t work on a God Damned car without cussing.
Great video I did not know about those stud removal sockets .Please keep up
these great videos, nice work…
Thank you SOOO muck for posting this. I almost took my Rx 300 in.
Thank you for these videos! I would like to see how to change the cam seals
as well. I’ve got another ten thousand miles before I have to do this job.
Just finished replacing the water pump, timing belt and tensioner on my ’99
RX300. With your instructions, the operation was a total success. The bit
about removing the studs was especially helpfull. I used a couple of jam
nuts and a wrench on the studs to help the Torx socket, so it wouldn’t
break off the stud tips. I had a REALLY rough time getting the harmonic
balancer bolt off. I ended up making a tool which uses the two threaded
holes in the pulley to keep the crank from turning. Thanks!
How would you get the coolant back in the block after reinstalling the
waterpump when the thermostat is closed? This is about the only part i dont
understand.