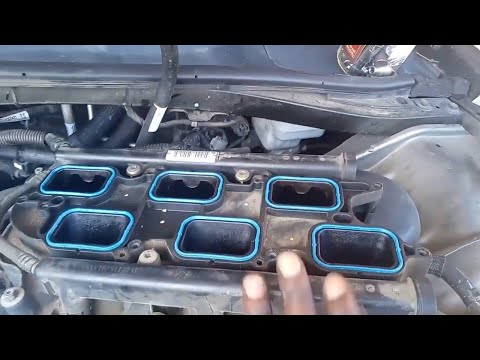
in this video I’m showing you how to replace the Oil Filter/Oil Cooler Assembly on a 2011 Dodge Challenger V6 3.6L. #oilcooler #dodgechallenger #dodge #dodgecharger
The oil filter/oil cooler assembly is on the 3.6L Pentastar engine of rear-wheel drive passenger vehicles. Specifically, the 2011-2017 Chrysler 300, Dodge Charger, and Dodge Challenger.
The video begins by explaining the reason for the replacement and then walks viewers through the process of removing the air inlet, upper intake, and lower intake assemblies. *INTAKE IS WHAT I MEANT TO SAY NOT EXHAUST*
*A failing oil cooler* can manifest in several ways, including oil and coolant mixing, overheating, engine performance issues, and warning light illumination. Specifically, a faulty oil cooler might cause oil to leak, potentially contaminating the cooling system and mixing with coolant. This can lead to a “coolant and oil cocktail” as described by Pro Flow Performance Products, potentially causing overheating and engine damage.
Timeline:
0:00 Detail of the repair
0:48 Intro D/I/Y Diagnostics N Repair
1:20 start of the removal of the engine cover, showing you the tools that you need to do the job, removing the air inlet, and other objects that need to be moved
3:37 removal of the hose, bolts, bracket, and pigtails
6:45 removal of the top intake
8:33 removing the ignition coils pigtail and the injectors pigtail
11:00 starting the removal of the bottom Intake
12:08 Starting the removal of the oil cooler
14:37 The Oil cooler is out of the vehicle
14:42 *Must Watch: Very Important Information*
*For More Videos* https://www.youtube.com/channel/UCbxXXytEdpSoo9WHo4M7V5g
*Thanks for watching my video. However, please watch the entire video so it does NOT mess up the AVD (average view duration). So, please be kind and press rewind*
*D/I/Y Diagnostics N Repair Channel Home Page* https://www.youtube.com/channel/UCbxXXytEdpSoo9WHo4M7V5g
*Become A D/I/Y Diagnostics N Repair Subscriber*
https://www.youtube.com/channel/UCbxXXytEdpSoo9WHo4M7V5g?sub_confirmation=1
*Like, Comment and Share* *Turn On The Notification Bell For New Videos*
*If The Video Was Helpful, remember to give it a “Thumbs up” and Consider Subscribing*
*Recommended Videos/Playlist Videos*
https://youtu.be/iC5wLYP6S2s
https://youtu.be/PN2SEtCVwgI
https://youtu.be/lCKu91AtD0w
https://youtu.be/rro_cu_PqTQ
https://youtu.be/AxSQjEyn_aU
https://youtu.be/mrvKPsPM2cg
https://youtu.be/zbszv5Gre4M
https://youtu.be/-4SvugSQvF0
https://youtu.be/qvqiuR15hCw
https://youtu.be/HnDPqdPZI8k
*Disclaimer*
This video only contains tips and recommendations that could be helpful when carrying out car repairs or replacing parts. *D/I/Y Diagnostics N Repair* is not liable for any harm, injury, or property damage incurred while carrying out repairs or replacements that are a result of incorrect use or misinterpretation of the provided information. This video is for informational purposes only and does not guarantee the achievement of a specific result. The user is personally liable for incorrect use of repair equipment, tools, or car parts, particularly when this use poses the risk of injury. *D/I/Y Diagnostics N Repair* strongly recommends being careful and adhering to the safety rules when doing any repair or replacement. Keep in mind that using low-quality-auto parts does not guarantee the proper level of road safety.
)
this a great video
man you keep doing your thing, good info.
If The Video Was Helpful, Remember to Give it a "Thumbs up" and Consider Subscribing Also leave a comment and share, tell a friend, tell a friend